Using Supabase Auth with Triplit
Supabase Auth (opens in a new tab) is one of the services in the Supabase ecosystem that makes it easy to manage user accounts and authentication in your application. This guide will show you how to set up Supabase Auth with Triplit.
This guide assumes you have a Triplit project set up. If you don't have one, you can create one by following the Quick Start guide.
Create a Supabase account and project
Use the Supabase dashboard (opens in a new tab) to create an account and a project. This will setup a Postgres database and a Supabase Auth instance for your project.
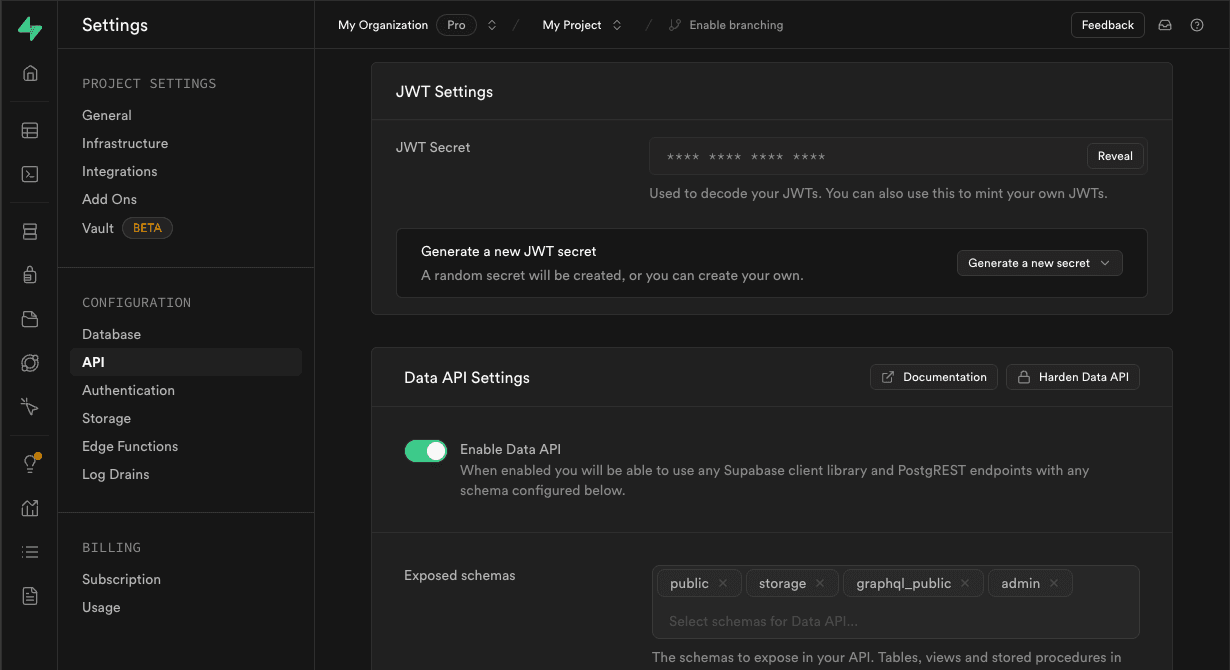
Get the JWT Secret for your Supabase project
We also need to configure Triplit to validate the JWT tokens issued by Supabase. To do this, we need the JWT signing secret for your Supabase project. You can find this in the JWT Settings panel section of the API Settings panel.
For local dev, add this to your .env file in your Triplit app:
TRIPLIT_EXTERNAL_JWT_SECRET=<supabase-jwt-secret>Start the Triplit development server
Now that we've configured Supabase and added the necessary environmental variables, we can start the Triplit development server:
npx triplit devAdd Supabase Auth to your Triplit app
Your app should have some flow to authenticate a user (opens in a new tab) that uses Supabase's authentication methods. Once a user is signed in, your Triplit client needs to send the JWT token issued by Supabase with each request, and handle other authentication events.
import { createClient } from '@supabase/supabase-js';
import { TriplitClient } from '@triplit/client';
import { schema } from './schema';

const supabase = createClient(
  'https://<project>.supabase.co',
  '<your-anon-key>'
);

const triplit = new TriplitClient({
  schema,
  serverUrl: 'http://localhost:6543',
});

function getSessionAndSubscribe() {
  const { data: session } = supabase.auth.onAuthStateChange(
    async (event, session) => {
      switch (event) {
        case 'INITIAL_SESSION':
        case 'SIGNED_IN':
          await triplit.startSession(session.access_token);
          break;
        case 'SIGNED_OUT':
          await triplit.endSession();
          break;
        case 'TOKEN_REFRESHED':
          triplit.updateSessionToken(session.access_token);
          break;
      }
    }
  );
  return session.subscription.unsubscribe;
}
Generally you'll want to run getSessionAndSubscribe() when your app loads and then unsubscribe from the session changes when your app unmounts.
// on mount
const unsubscribe = getSessionAndSubscribe();

// on unmount
unsubscribe();
Test locally
Run you Triplit app and sign in with Supabase Auth. If you’re setup correctly, you should see the connection is established and your data is syncing with your server. If you can't connect, ensure that you set the TRIPLIT_EXTERNAL_JWT_SECRET environmental variables correctly.
Configure your Triplit dashboard
To use Supabase Auth with a deployed Triplit server, you just need ensure that it can use the Supabase JWT Secret to verify incoming requests.
If you're using the Triplit Dashboard, you can add the JWT Secret to the External JWT secret input in your project settings.

If you're using a custom self-hosted server, you need to set the EXTERNAL_JWT_SECRET environmental variable to the public key.
Add access control to your schema
Now that you have a user auth system set up, you can add roles and permissions to your Triplit schema. By default, the JWT issued by Supabase will set the sub claim to the authenticated user's unique identifier. It will also have the role: 'authenticated' claim. In Triplit, you can write a matcher object that will set up a simple user role:
import { Roles } from '@triplit/client';

export const roles: Roles = {
  user: {
    match: {
      sub: '$userId',
      role: 'authenticated',
    },
  },
};
Read here to see how you can use this Role to define a permission..